This mini 'How I do It' or 'Hidi' as I call them.
A Hidi is by no means a tutorial. With a tutorial, I show you how to do it.
With a Hidi, I show you how I did it.
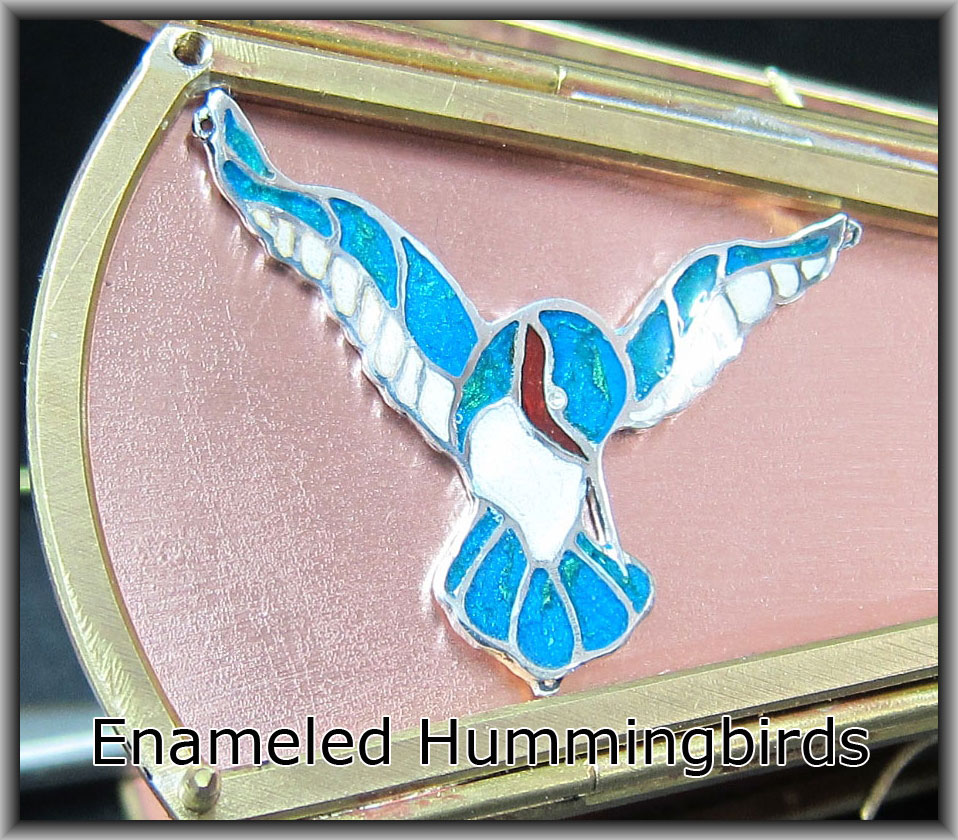
These are some enameled hummingbirds that were part of a sculpture called Nest.
Unfortunately, Nest is no longer in my possession.
It and many other art pieces were stolen from me recently.
The pictures of the sculptures were going to be compiled into a record when the piece was sold.
However, since they were all stolen I decided to chronicle them all anyway.
So this then is the Enameled Hummingbird Hidi.
I first draw some stylistic designs and shrink them to the size I want and then print multiple copies.
Then I take my coloring pencils and color them in.
I try different color combinations until I get some that I like.
I glue a plain copy onto some silver plate and pierce it out using a 8/0 blade.
The left side humming bird is pierced out of a 0.7 mm thick strip of sterling silver.
It is about 25 mm wide from wing tip to wing tip.
After I finished piercing it out, I dropped it into some lacquer thinners and the paper, which is on the right hand side of the picture, floated off perfectly.
In this picture on the left is the piece of silver plate with the paper glued on and the hummingbird cut out.
In the middle, the paper remains and on the right the soldered on humming bird.
It is soldered on to a 0.07 mm plate.
So the combined thickness of the two soldered together pieces is 1.4 mm.
When I solder the cut out to the plate, I use a very hard solder.
I also use as little as is possible.
I first melt the tiniest of pieces of solder onto the back of the cutout.
In this case, first on the tips of the wings and the tail.
I heat the piece from underneath and softly from the top, until the solder flows.
I cut the hummingbird out leaving a lip the outside.
This is where I place the tiny pieces of solder to solder the outside to the plate.
Also, I form the humming bird now, basically bending the wings and tail a bit forwards to give it a bit more depth.
Once the soldering is finished, I heat the piece up and quench it into my pickle about twenty times.
This builds up a layer of fine silver on the outside, which is more accepting to vitreous enamel than non quenched silver
For pickle I use PH down, (Sodium bi-sulfate) – the stuff one buys in swimming pool shops.
For this hummingbird I am using Thompson enamels.
No affiliation.
For tiny pieces like this, I torch fire. Here am packing the enamel. I have put some gold foil in first. Then I prod the foil until it is flat and then I pack wet enamel over it.
I place the piece on a plate of 1 mm stainless steel, and heat that up.
It is very controllable with a flame. I use a little torch with oxy-propane.
Here is the humming bird, dried out and ready for it's first firing.
After the first firing, it looks awful.
No matter, I just fill all the open parts with foil and enamel and fire again.
The finished hummingbird being positioned on the copper back ground. This angle shows the rivet holes well. The rivets used are 0.5mm in diameter.
These enameled pieces were mounted to a copper surface, so to make it easy to mount, I left three drilled 0.5 mm attachment points.
All that had to be done was for a rivet to be threaded through to secure the hummingbird.
Here is another hummingbird design.
This one I am firing on a piece of expanded titanium wire.
I only use stainless steel or titanium for this purpose.
I don't like using normal steel because little flakes can come off and go into the enamel, which is very annoying.
Here is the first firing of the bird and flower.
The two hummingbirds posed on the flower of Nest.
Here are the next two birds cut out and just posed to see if it looks OK.
The two new birds are soldered up and ready for firing.
I played around with many different coloring techniques for copper.
After all the birds were finished, they were all gold plated
I like the colour of gold against the enamel more than silver.
Also because there is little tarnish with gold.
Below is my contact email and other websites.
hansmeevis@gmail.com http://meevis.com/jewelry-catalog.htm https://www.jewelry-tutorials.com/ https://www.drill-straight-tools.com/