

I made this fantasy project with the Hercules beetle in mind.

I start off with a 1 mm plate of brass and bend it into a teardrop shape.
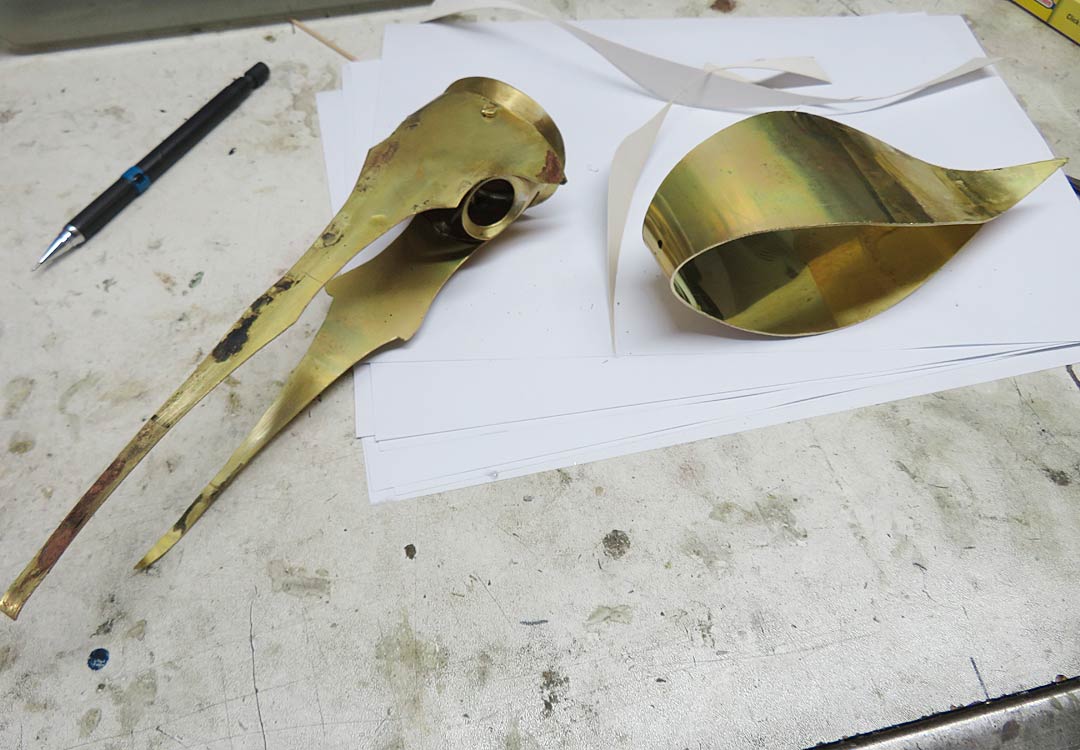
Then the basis of the head and eyes.

Once I had the body and head shape designed, I could go about designing the shape and size the wings and tail section.

Then I added the sides to the mandibles and also made the ground work for the alien cockpit.
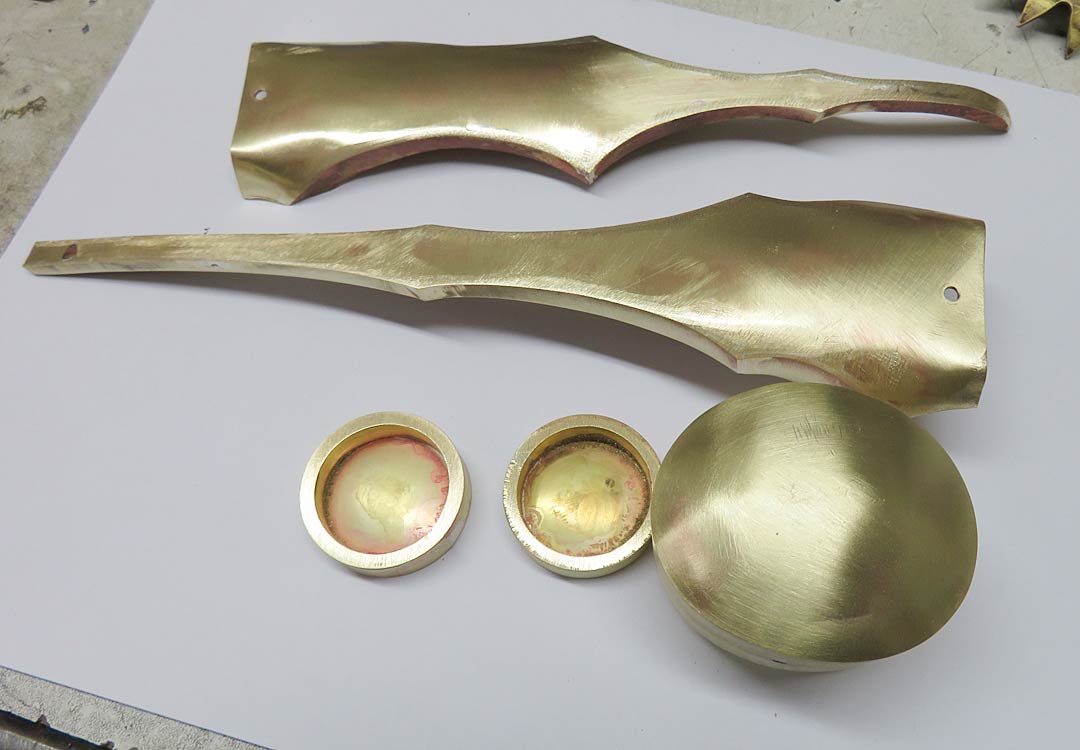
The basic eye, head and mandible parts pre finished.

Cockpit and body.

The whole drama laid out.

Lots of sanding and filing still to be done.

Putting the side on the body. The red is iron contamination the gets sanded off later.

The top of the wings are made out of 1 mm titanium sheet and the bottom are made out of 1 mm copper sheet.

The borders are made out of 1 mm brass that is filed half round.

The basic tail design.

The tail and rudder are also made with titanium and copper sheet.

Ready for finishing.

Once they were ready for finishing, it was time for the legs.

I made the legs out of 6 mm round stock.

The legs connect to a central box and are held in place with stainless steel cap screws.

Here I am shape filing the legs in preparation for the feet that have still to be made.

The feet are made from 3 mm brass plate. Pierced and filed out.

I made the tongue out of 6 mm heat forged mild steel.
I like the black colour it becomes when it it forged.

I had the idea of making a separate attack animal that would fit onto the Beetle Fighter, and after I made it, I discarded it. Like so many of my ideas.

Instead, I turned it into a separate mini sculpture, with a separate display that is not part of this Hidi.
Made out of sliced Sugalite, silver, brass and iron with some gemstones as well.

I inlayed crushed Lapis Lazuli in a silver cloisonne surround
First I pierced out the silver then riveted it to a brass background.

That was attached to the top of the mandible.

Fitted to the top front mandible..

The front hook is made out of iron and the collar is made out of silver set with Sandawana emeralds.

The rear eye surround is also made from iron.

The alien pilot. First a little sketch in Plasticine to get the feel.

Then a wax model for casting. I carve this from a bar of Ferris purple wax.

I spin cast all my own stuff. This is the flask, ready to be filled with plaster.

Cast in silver but still unfinished.

I made some silver plique a jour wings for him.

I make plique-à-jour with the copper foil back method.
The first layer of glass enamel, packed and ready for firing.

After being torch fired.

The wing, temporarily mounted.
I also pavé set some gemstones in his chest and emeralds in his eyes.
The control sticks have two sapphires that I faceted and set into them.

This is the rear body section that I made with silver, Lapis Lazuli and red jasper.

Turning out the eye surround.

I turned a lip in them so that the class eye lens can fit inside.

I wanted to set stones into silver so I soldered a layer of plate silver on top of the brass rings.

Then I trimmed the silver down.

I prepared the silver to accept the stones.

The gemstones are set. Aquamarine, peridot,blue topaz, amethyst and garnet.
I also painted two eyes with acrylic paint.

The rear of the eye screws into the head with a 3 mm thread.
The flat head screws at about 3 and nine 'o clock hold the gem set surround in place.

The finished eye.

The wings before and after heat treating.

The legs finished and ready to be assembled.
Finished piece.

Front view. Now to make the display.

The base of the display box is has a inner ridge of crushed Malachite
Then I used resin and gold colored foil for the bottom.

I also added resin to make it look wet. Then I also added glow powder, just for fun.

The night time glow.

Through the glass

In the Display Box.
Below is my contact email and other websites.
hansmeevis@gmail.com http://meevis.com/jewelry-catalog.htm https://www.jewelry-tutorials.com/ https://www.drill-straight-tools.com/